Showing posts with label vintage embroidery. Show all posts

Sunday, March 13, 2016

My Sister is "Crafty"...

Quote for the Day:
"The advantage of growing up with siblings 
is that you become very good at fractions."
 ~ Robert Brault


While in Florida, my sister Bev STARTED AND COMPLETED a craft project!!  (I am a good "starter"...but not so good at "finishing"...)

She has been collecting vintage embroidered linens that she finds at thrift stores and antique stores...table cloths, pillow cases, and table runners... and she turned them into this valance for her Florida-home lanai.  It turned out so beautiful, I just HAD to share these pictures with you...


She "lined" them with some tone-on-tone white fabric.  

I LOVE this!!  I think they turned out gorgeous!  Now I want to make some...maybe for  my kitchen windows?  Hmmmm...

Loretta

Saturday, April 25, 2015

New Quilt Project...


About 5 years ago, I purchased a hand-embroidered vintage quilt top off of Ebay.  My daughter saw it, finished some the embroidery that needed completed, and asked if I'd make it into a quilt as a wedding gift for her and Dale when they got married.  

It seems that wedding is in the works for later this year, if all goes well!  Hence...I figured I'd better get to work on it.  

It is a king-sized quilt, measuring 100" x 100".  Whew...might take me a little while!  

It is too big to get a nice picture of it in my house because I really don't have a place or bed that big to lay it out on, so I took pictures as I was loading it into the frame yesterday.  


I started hand quilting it today.  What I like about these tops is that the quilting lines are already pre-printed on them so there is no marking involved!


Like most vintage linens, there are some "storage spots" that will show up in the pictures as I post my progress.  These don't bother me because when it is all done, I will soak the whole thing in Oxi-Clean.  I do this to all of my vintage linens that have storage stains on them and I've never had any stains that not come out.  ("Storage stains" refers to the brown spots that are caused by either bugs that get up into the fabric at some time OR that come from being in contact with non-sealed wood like a cedar chest or wooden shelf.)  You can't wash the item before quilting because it will wash out the pre-printed quilting lines and you take a chance of the unfinished edges raveling.  

Loretta

Wednesday, March 18, 2015

Vintage Stars quilt is DONE!!!

Quote for the Day:
"The hardest thing to find in life is happiness -- 
money is only hard to find because it gets wasted trying to find happiness."
~author unknown


I finished piecing the Vintage Stars quilt top made from vintage embroidered linens about 2 weeks ago.  Because I had to add interfacing to the vintage linens to give them added strength, I didn't want to try to hand quilt this one.  I also didn't feel that my machine quilting would do justice to the design, therefore, I decided to quilt this one "by checkbook"....the first quilt that I have ever sent out to be quilted by someone else!

I reached out to a local long-arm quilter here in Grafton, Joann Sturm, that I used to attend church with.  She listened to what I wanted and had it completed and back to me one week later!  She did a great job of custom quilting on it!  When I got it home, I added a scrappy binding and labeled it.  I still need to wash it, but wanted to go ahead and photograph it and share it with you!


Here are some close-ups so you can see the excellent quilting in the blocks and sashings...


...and in the pinwheel cornerstones...


The border...


The pieced back...


...and the label...


This one is for ANDY & ME!!!!!!!!  I give most of my quilts away...but this one was made for us!!!

Now...I'm going to go put it in the wash...  :)

Loretta

Tuesday, February 3, 2015

Ready For Borders...


I recently finished piecing the top for my vintage embroidery quilt...BTW, I need to come up with a snappy name for the quilt, so if you have any ideas, please post them!   I still need to add a border, but I need to go shopping because I don't have enough of any one 1930's reproduction fabric to make the border.  

The 25 pieced blocks sewn together measure 88" X 88" and I plan to add a 6" border all the way around to make it 100" X 100".  I've tossed around the idea of quilting this one "by checkbook"...which is where you send it out to be quilted by someone else, either longarm-quilted or hand quilted...in this case longarm quilted, because I don't feel like hand quilting this one and didn't feel that I could "do it justice" with my machine quilting.   If I did send this one out to be longarm-quilted, it would be the first ever that I haven't quilted myself, either by hand or by machine.  

I am still thinking it over, but am pretty sure that I am going to go ahead and machine quilt this one on my Juki TL 2000Qi.  After all, that is why I bought the machine last summer...to make machine quilting my quilts a little easier.  Sending them out to be quilted isn't cheap and I'm such a tightwad!  And my mediocre maching quilting skills will just have to suffice.  "Done is better than perfection" as the saying goes.

Here is the top draped over the pole on my hand-quilting frame.  Sorry that you can only see 2 of the 5 rows...but you get the idea.


The pinwheel cornerstone blocks were made from the leftovers that were cut off when making the star points, so no scraps were wasted!


My goal this year is to work on some of the UFO's and projects that I've started previously and keep my new starts to a minimum.  ("Yeah, right", said all the quilters out there!!)

About 2 years ago, I started making some strip blocks from scraps to be used in "Tulip Fields", a pattern by Bonnie Hunter in her book "String Fling".  You can see a picture of her completed quilt by clicking here.  

I pulled the string blocks out that I had started and started adding the "tulips" to them ...


I've had a lot of fun making these so far, so until I have the fabric for the border on the embroidery quilt, I'm going to continue to toodle around with them and bust some more scraps while making them!  

After being in my new sewing room for 22 months, I've found that there are a couple of things that aren't working for me just the way I'd like.  I've been doing some thinking and planning on what I want to do to make the room more functional for me.  Since I'm going to need Andy's help with hanging the shelves, etc., that I want to do, I'll need to share my plans/ideas with him at some point...preferably at a time when he won't roll his eyes and shake his head at me!  

Loretta

Sunday, December 28, 2014

Crocheting and Quilting...

Quote for the Day:
"Knowledge is realizing that the street is one-way, 
wisdom is looking both directions anyway."
~author unknown


My daughter said that my granddaughter wanted some mittens and an ear warmer for Christmas...mittens because she's only had gloves until now, and an ear warmer so her hair wouldn't get messed up by a hat.  Since Sera is 8, life is all about "Frozen", the Disney movie....which, by the way, I haven't seen, yet....but I'm sure I'll get the chance when we go to visit soon!  
Armed with this knowledge...mittens...ear warmer..."Frozen"...I went to work on making those items for her for Christmas.  We will be celebrating our Christmas when we go visit, so that gave me a few extra days after Christmas to finish them up.  I put the finishing touches on them today. This is my first experience at making either one, so I'm kinda happy with the way they turned out!  


I purchased the blue yarn, but the white with silver yarn and the eyelash yarn were gifted to me by two of the ladies in my fibers arts group.  I think those two yarns really added a "frozen" element to them!  I hope that Sera like them and that they fit!   


Last week I showed a quilt block I had made with vintage embroidered linens and 1930's repros fabric.  I've had fun making more of those blocks while on Christmas vacation, and now there are 16!!


Here's a close-up of some of the blocks....


I think this next one is my favorite one so far because I decided to leave the crocheted edging on it...


Loretta

Monday, December 22, 2014

A New Project...


Background:  I collect vintage hand-embroidered linens...dresser scarves, doilies, pillowcases, etc.  I don't just "collect" them, I actually USE THEM in my home on a daily basis!!!  

However, sometimes items will get stained or develop holes in them, and I can't bring myself to just toss them out.  So what's a girl to do???  For a couple of years now I've been thinking of how I can preserve the embroidery in a quilt.  I came across this blog post this past summer and decided that I wanted to do something similar...


I like the way she cut out the usable parts of the embroidery and added 1930's reproduction fabrics (these kinds of embellished linens are usually from the 1920-1940 era).  This past summer I started collecting 30's repros with this kind of quilt in mind.

However...I LOVE LOVE LOVE star blocks...especially when the stars look like they are floating rather than touching each other.  I've been doing some research and finally found a free pattern here that has floating stars.  

Yesterday I made a test block out of some scraps to see if I liked the way it looked and if it would go together fairly easily without too much aggravation, hair-pulling-out, etc.  I am pleased to announce that it met all of my criteria!  :)

My test block...I'm thinking I might turn it into a pillow for our sofa...


Well...I couldn't stop there.  Nooooooooo...I had to go on and make a block out of one of my vintage pillowcase embroideries...


I know I'm going to have fun making this quilt because I just LOVE those 30's reproduction fabrics.  By the way, because some of these linens are thin, I am applying a lightweight iron-on interfacing to them to strengthen them in the quilt.


Now I want to share a new quilting notion with you that I purchased at my LQS, Classic Quilt Shop.   In the past I have hated HST's (half-square triangles) because of having to mark the backs of each little piece and then TRYING DESPERATELY to sew straight, etc.  Just a pain in the you-know-what to me.  They always came out wonky.  :(

I found this notion at the quilt store and used it yesterday to make my blocks and IT WORKS!!!


It is a piece of plastic cling that you put on the bed of your machine and it gives you lines to match up your points to...then you just guide your fabric under the needle while keeping your corners lined up on the lines!!!  Easy-peasy!!!   It also has a 1/4" guide line so when you are sewing a scant 1/4" seam, you just line up your fabric to that one!!!  Since it is a cling it is easily applied and removed as often as you need!

Here it is on my machine with a leader/ender under the needle.   Ten dollars well spent!!!


Loretta


Saturday, February 8, 2014

Cabin Fever...


I'm soooooooo ready for winter to be over and for SPRING to get here!  With all the cold weather and snow, Andy has been working day and night (he does heating and air conditioning repair), so unless we are working, we are basically housebound.  

Today I felt like I needed to get OUT and to peruse some antique stores.  I am looking for a wall shelf/cabinet with glass doors...something about the size of a medicine cabinet...to display my sewing-related collectibles in my sewing room.  I found one on Ebay that would have been perfect, but with the price of shipping, it was just too much.  :(

I told Andy that I was going to go "antiquing" and asked if he wanted to come along.  He jumped at the chance to get out of the house without it being something having to do with work!  

Our first stop was a consignment store where I picked up these vintage hand-embroidered pillow cases for 75¢ each!!!  I plan on cutting them up and using the embroidered part in a quilt I have planned using 1930's reproduction fabric!  :)


Our next two stops were at "country/primitive" decor stores and I picked up a gift for someone and one of those soap dispensers that look like a canning jar...similar to this...


At our final stop...an antique mall...I saw lots of BEAUTIFUL quilts, but, alas, none came home with me.

A beautiful bow-tie quilt from feedsacks!  

AHHHH...the mother-lode of quilts!!!

And even MORE quilt scrumptiousness!!!

Mind you, it was VERY difficult to walk by them, but I did stop to "fondle" them a little!  LOL

At the antique mall, I also saw these aluminum tumblers, complete with carrier...


Does anybody else remember growing up with these???  I don't believe that our family actually owned any, but I do remember drinking from them back in the 60's and 70's!   Do you remember how ICE cold they got from the ice and drinks inside and the condensation would run down the outsides???  The aluminum got so cold that I was always afraid my lips would stick to them like your tongue does to frosty metal!  LOL


Memories!!!

Loretta

Wednesday, August 7, 2013

SEX and Other Things...

Like Mrs. Bobbins in the cartoon, I decided to have SEX today (Stash Enhancing eXperience) for a WHIMM (Work Hidden In My Mind).  

I fell in serious love with this quilt at the quilt show because of the soft tones of the feed sacks...


I love love love the 1930's reproduction fabrics that are out these days, but have never bought more than a stray piece of them.  

As you may remember, I collect vintage linens with embroidery on them, but sometimes they have (or develop) holes or stains.   I've been putting those aside with plans to make them into a quilt, somehow.  

I saw this blog post from HenHouse where she made some quilt blocks using vintage embroidered linens and 30's repros together...


I don't think that I have THAT many embroidered linens to make enough blocks for a whole quilt, so I decided to combine the idea of the two quilts somehow.  I haven't come to a definite conclusion, but I'm thinking of adding strips of 30's repros to the embroidered linen pieces to make them, say 8.5" or 9.5" unfinished.  Then take the 30's repros and making some pinwheel or other pattern block and alternating the two blocks.  

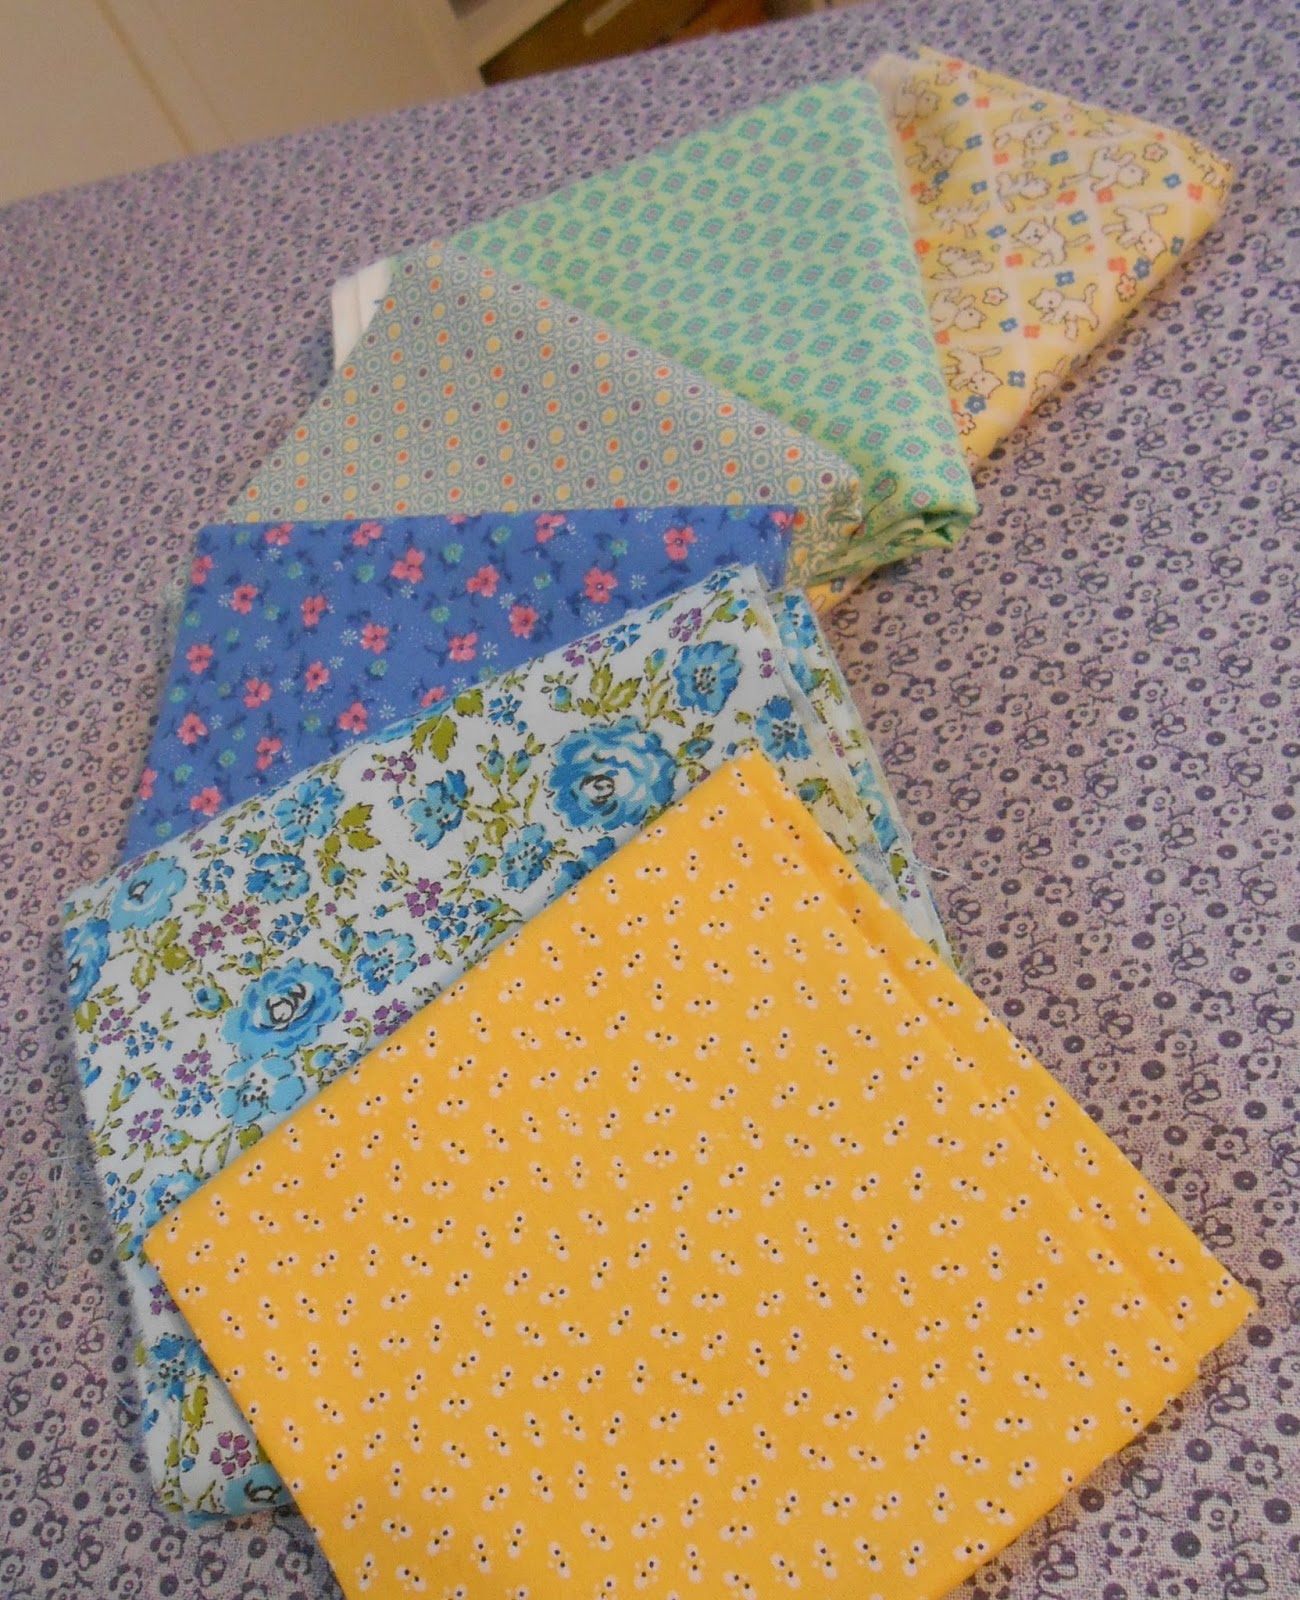
Which leads me to my SEX today.  After my hair appointment in Fairmont, I went to the LQS there and picked up some white Moda muslin and some 30's repros FQ's (fat quarters, for the non-quilters who read the blog!).


I will add them to the few 30's repros that I already have...


Hopefully, this project won't be a PIG (Project In Grocery sack) for long.  I'm looking forward to making this beautiful quilt, but I'm afraid I'm going to have to have a couple good, stiff drinks to be able to cut into the embroidered linens and to cut through the embroidery to get them small enough to put into these blocks.  Cutting into the vintage linens will be like cutting into a damaged quilt...I'm afraid I will hear it shriek like lobsters do going into the boiling water.  :(    You do know that quilts cry when you cut them, right?  They do.

This quilt will be for ME!  :)  I don't make many for myself...I usually give them away.  But this one will be specifically for me.  And Andy.  Maybe.  :)


Now, here's an update on the construction progress of our buildings....
Basically, nothing more has transpired with my garage, but Andy's workshop is pretty close to being done.  


It still needs a window installed in the back wall, and the trim and gutters installed, but other than that, it's pretty much DONE.

Of course, give a guy a toy and he can't WAIT to play with it...


Andy had to try the doors to see if everything worked and I caught this picture just as he was raising the roll-up door!  Yep...the door works!  :)

Loretta