Saturday, March 9, 2013

Making Do...

Quote for the Day:
“Use it up, wear it out, make it do, or do without.”

~
Boyd K. Packer


Friday evening, Andy & I finally finished putting the Ikea cabinets together for the sewing room. There's just one "little" issue...


When Andy put the backing board on the middle, open cabinet, he put the backing board on backward so the brown faces the front and the white faces the back.  :(     (He also put one of the permanent shelves on backwards on one of the cabinets with doors, so that the bare wood was facing the front...I had to grab a small paint brush and my trusty white paint and paint that part up.)

Now, putting the backing board on backwards is not *totally* his fault, though he didn't notice it until everything was on and nailed into place.  However, unbeknownst to us, that packaged was damaged and the only piece that was damaged was the white side of the backing board.  So even if he had put it on correctly, there would have been an issue with it.  
I didn't want to paint the backing board because it has a very glossy finish and would have had to been "de-glossed", then primed, and then painted...and I just didn't have the stamina or time to do all of that.

Okay...what to do???

Pinterest to the rescue!!  :)  I had seen some "pins" where people had posted pictures of cabinets and shelving units where the back board had been covered with either fabric or pretty scrapbooking paper.  Since I would NEVER part with my precious fabric for that use, I decided to check out the scrapbooking paper supplies when I was in Joann's yesterday.  Lucky for me I found a "book" of paper on the clearance aisle...180 coordinating sheets for $8.97!!!  SCORE!  


I save my used rotary blades that are too dull for fabric, and an extra rotary cutter to cut paper with, so I pulled them out for this task.


I also pulled out my can of spray adhesive and got down to business!  
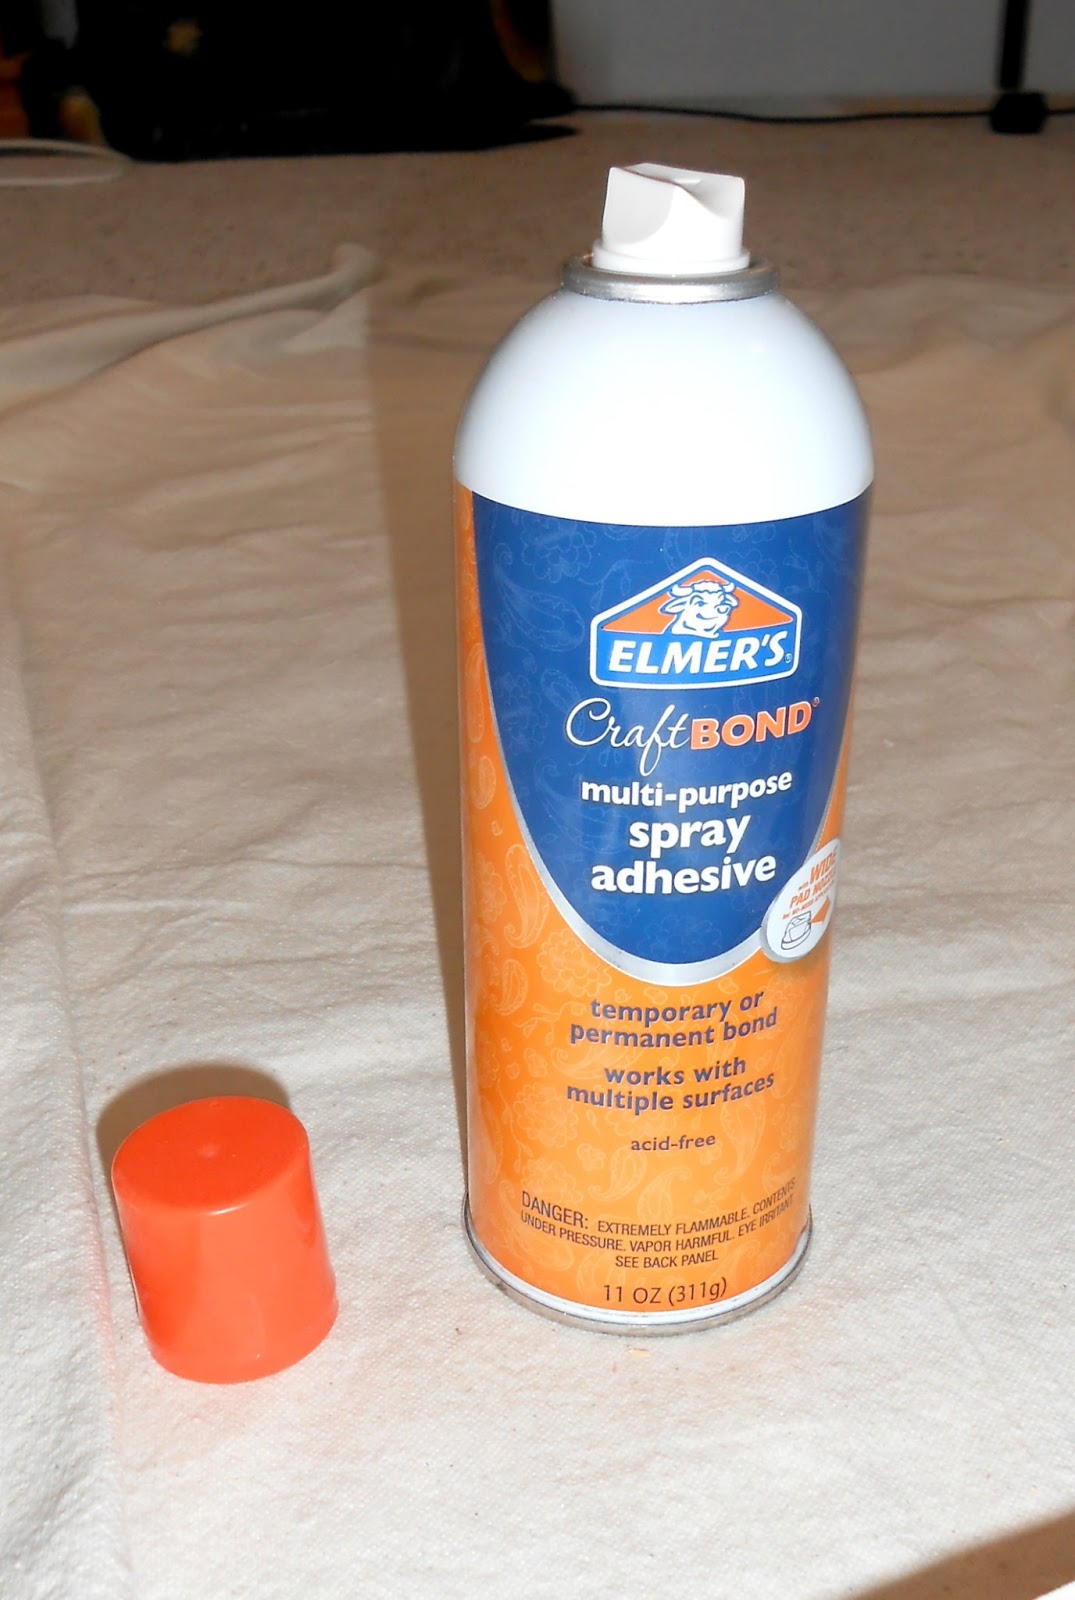

Just cut the paper to fit, spray the back of the paper with the adhesive, and apply paper to the backing board.  Easy peasy!

And this is what the open shelving unit looks like now...


Here's a close-up of the top three shelves...


...and of the bottom three shelves...


No more ugly brown backing board!  YAY!!  :)   I think it's just the right amount of "girly"!  Erin says it adds a "shabby chic" look to the room!  Win-win!!

I plan to use more of the paper to dress up the room as we go about pulling the room together this week, so check back for more updates!  :)  

Loretta

Friday, March 8, 2013

Bored Bored Bored Bored...

Quote for the Day:
"I think I could give up cigarettes easier than you could give up sewing."
~Andy Flood

I've been what seems like AGES since my sewing and quilting rooms have been torn up in the process of combining them into one room.  :(  I haven't been able to get to my sewing machine, fabric or tools for a couple weeks now.  And I haven't had a quilt in my quilting frame since Feb. 1!!!

YIKES!!!

No wonder I'm going "stir-crazy"!   First, I was waiting till we could go purchase the shelves for fabric storage...that happened last weekend.  Now I've been waiting for Andy to put them together for me...that's been occurring ever-so-slowly over the last several evenings...after he's put in a long day at work....and they still aren't completely finished.  One unit still needs the doors attached.  Then we need to figure out the exact spots that we are going to place them, so Andy can attach them to the wall for safety.  Then on Saturday, Erin is coming home to help me get everything back in working order...all nicely organized.

So, just WHAT IS A GIRL TO DO in the meantime to keep from going completely berserk???

I know...I'LL START A NEW PROJECT!!!

I can't get to my regular fabric and tools, but I can get to the cutting table.  And I *think* I know where a rotary cutter is, and I can get to my rulers, my boxes of scraps, and my Featherweight.  'Nuff said.

I know what I'll do...I'll set up on the dining room table and do a little string piecing!!!  :)

Originally, I was just going to do some mindless sting piecing, using used dryer sheets as a foundation.  (If you mention doing that on a quilting forum you will get LAMBASTED for using dryer sheets for foundation.  HOWEVER, this is MY blog and I *will* show you how to do it.  *IF* you know of someone who is allergic to dryer sheets, please, by all means, DO NOT give them a quilt that uses them for foundation piecing.  How simple is that???  It's not rocket surgery!!  Oh, you non-quilters out there, you have NO IDEA how passionate quilters can get when debating the use of used dryer sheets for foundation quilting.  Oy vey!  Most people use paper for foundation piecing, but life is too short to take the time to remove all that paper!  So I leave the dryer sheets on the block and just quilt it in.)

Anyway...back to the topic at hand... instead of just doing random string blocks, I decided that I actually wanted my strings to be made for a specific quilt, and not just another "string quilt"...I've already made one of those and I'm not into repeating patterns...life is too short to repeat patterns!  LOL

Since I have Bonnie Hunter's book, String Fling, so I perused it and found a pattern that I thought I'd like to make and cut my dryer sheets according to those dimensions.  

This is the pattern I decided to make...Tulip Fields!


I took my Singer Featherweight, an ironing pad, my iron, and all my crumbs and scraps of fabric downstairs to the dining room table last night and set up little area where I can create until the sewing room is ready for use.  It was at that point, that Andy made the statement that I quoted at the beginning of this post!  :)

So now, here's how you use used dryer sheets for quilting...
First, using a very low setting on the iron, press them out so they look like this...


Next, using your rotary cutter and ruler, cut them into the size you need...in this case, 4" squares.  I am able to get 2 squares out of each dryer sheet.


Following the directions for the pattern you are using, sew your fabric strings onto the dryer sheet using the regular stitch length and a 1/4" seam.  (Since you are not removing the foundation, you don't need to shorten your stitch length.)


Make sure the entire piece of dryer sheet is covered.  They will look like this...an ugly mess!  LOL


Next, flip your "block" over and square up to whatever size you need...in this case, I need 3 7/8" square.  When trimming, make sure your 45 degree line on your ruler goes right down the middle of the center strip.


You end up with a pretty block like this...


Now the pattern I'm doing calls for the block to be cut into two, right down the middle of the first strip that was sewn corner to corner.  Like this...


These two triangles will be two "baskets" for the tulips.  :)

Here are some of the blocks squared up to 3 7/8", but not split down the middle yet.  I'll keep them in the square form till they are needed for the rest of the pattern...they will be easier to store and count that way!  :)  I need 144 of these squares, and last night I was able to make 12 of them in about one hour!  :)


BTW....just because you are using scraps, do NOT expect your scrap pile to decrease in size.  You see, there are two kinds of organisms in this world, ANAEROBIC...those that DO NOT need oxygen to survive, and AEROBIC...those that DO need oxygen to survive.  

Scraps are AEROBIC...meaning that as long as you keep them from air and light, they are dormant.  HOWEVER, when you expose them to air and light, they MULTIPLY like rabbits!!!   So what fit into three of these plastic shoe-box size containers will NOT fit when I am done!  :(  It's the law of scraps. Scraps beget scraps, ad infinitum!


Loretta

Tuesday, March 5, 2013

Shelf Redo...

Quote for the Day:
Creativity is a great motivator because it makes people interested in what they are doing. Creativity gives hope that there can be a worthwhile idea. Creativity gives the possibility of some sort of achievement to everyone. Creativity makes life more fun and more interesting.
~Edward de Bono

In the process of moving the furniture from my former sewing room into my new sewing room, I thought I'd do something to spruce up one of the shelving units that was in bad need of a makeover.  


Before our hospital moved into their new building 2.5 years ago, whenever they did a remodeling project, they would have a "furniture auction" and auction off whatever they were taking out of commission.  Over the years, we have picked up some good items, like this shelf.  It is solid wood and HEAVY.  Very functional.  And butt-ugly!  LOL

So...I decided to paint it.  One coat of Kilz primer and 2 coats of a freebie paint that I got from Glidden...Muslin White...applied with a sponge roller.  (Every so often Glidden has a giveaway and gives free pints of paint in your color choice.  You fill out a form online and they send it to you.)


But...each shelf has 2 deep grooves in it.  There are also grooves in the underneath portion of the shelves...I think that this was probably in doctor's office to hold patient files, or something similar, and those slots were used for dividers to slide into.

Anyway...what's a girl to do?  I tried to caulk them but they were so deep and wide that I got nowhere fast trying that.  Hmmm...put your "thinking cap" on, Loretta.  (Remember when the teacher used to tell you to "put your thinking cap on"???)   

Then I remembered this pin that I had pinned on Pinterest.  Cue the light bulb...and the angels singing...

I went and bought a box of cheap peel and stick floor tile, 25 tiles for $9.99, and applied them to the shelves.  Easy peasy!!


I did not paint the shelves, only around the edges, so you wouldn't notice if the tiles weren't cut perfectly.  And here is the NEW & IMPROVED shelving unit in her corner, just waiting for sewing and quilting stuff to be stored on her!!  


To put it in perspective, here are the before and after images side by side for comparison!


Much better!!   Don't you agree???

Loretta

Monday, March 4, 2013

Answering Those Probing Questions...


After my last blog post about "acquiring" two more quilts, my dear niece, Kristin, who is not a quilter, but still has a great blog of her own, left a comment with several questions in it.  I thought I'd take the opportunity to answer her questions in the form of a blog post.

Here is her comment:
Looks like you had a great weekend!I have some questions: 
1.) How many quilts do you have in your house???
2.) Do you rotate/use them all?
3.) What do you do if you ever get tired of a quilt?
4.) Have you ever tried the e-bay game with quilts? Buy low / sell high?
Hmm, sounds like answering those questions could be a blog post...
Okay, here goes...

1)  Number of quilts in my house:  22 quilts of various sizes, from couch quilts to queen-sized...counting the two "new" ones we got this weekend.  This number does not include quilts that aren't mine or ones that are projects that I am working on.  (Please don't ask me how many UFO's ["unfinished projects"] or PIGS ["projects in grocery sacks"] I have right now...that number may be higher than 22.  I dare not count!)

2)  I do rotate my quilts and use them all at one time or another.  Some are only used when we have company, ie, when there are more beds and people to keep warm.  Some are made with spring/summer colors, so get used during those seasons.  Others are in fall/winter colors, and get used during those months.  You must keep in mind that we have NO BLANKETS in this house.  As my quilt collection grew, I gave my blankets away and we just layer quilts.  Right now we have 4 on our bed.  As the weather warms, we will pull them off one at a time.  During the hottest part of the summer we usually use one light quilt.

3)  I've been known to pass quilts along to my kids when they've needed them, as they've gotten houses and more bedrooms, etc.  Just last week, Trinity asked me if I had a full-sized quilt that I could part with because they need one to use on their guest bed.  I think I can spare one!  LOL

4)  No, I've never gambled with buying quilts low and selling high.  I'm afraid that I would fall in love with all that I buy and not be able to part with them!  LOL  But I am a "quilt rescuer"...hence buying the quilts at the thrift store.  Or if I see one for a really low price at a yard sale or auction.  If those quilts had been appropriately priced this weekend, I wouldn't have bought them.  I refuse to let someones hard work and love go unappreciated.  In fact, I been known to bid up a quilt at an auction...or even buy it myself...if I think that it's not going for the price it should... just to get some justice for the quilt maker and for quilters everywhere!  There is a LOT of MONEY and TIME and LOVE that goes into making a quilt for someone to flippantly toss it away.  That's why I "rescue" quilts from the thrift stores.  Like the baby blanket that we put on our pillows for Ginger to sleep on during the day.  It was HAND EMBROIDERED and HAND QUILTED and was on the shelf at Goodwill for $3.83.  :(   Somebody's Grandma was rolling over in her grave when that thing got donated like a common piece of trash.  But she can rest now knowing it has been saved and is being used and loved everyday.  :)   It is not uncommon for the supplies to make ONE queen-sized quilt to cost about $150.00.  And that doesn't even include the HOURS involved in planning and making one.

I love quilts.  I love quilting.  I love the artistry of quilts.  I love the history of quilts.  I love the legacy that quilting leaves.  When you've been surrounded by a homemade quilt, you've been surrounded by LOVE!


Loretta

Sunday, March 3, 2013

More of My Thrifting Finds...

Quote for the Day:

"If saving money is wrong, I don't want to be right."
- William Shatner


Last night it was snowing and seemed unusually cold.  So guess what ended up on our bed???


That's right...one of our quilt acquisitions from this weekend!  :)  This is actually the SECOND time we've slept under it...

See, I HATE HATE HATE those shiny, slippery, polyester, gag-me ugly bedspreads that most motels use on their beds.  I pull them off and throw them on the floor and just turn up the heat when I find those horrid things.  

We had already purchased our quilt finds when we checked into our motel.  Without seeing the room I thought we'd possibly find one of those butt-ugly bedspreads on the bed, so I suggested to Andy that we should take one our quilts up and use it instead.  When we got into the room, we found that there was actually a very nice cotton spread on the bed.  Since we had brought it in from the car, we decided to go ahead and throw our quilt over the top of their spread and use it, anyway.  :)

You can see that it's a little small for our bed, but it works just fine to add another layer of warmth!  (The outer border of the quilt is gold, so the red you see below the gold is actually another quilt underneath it.)

As I was unpacking the rest of our thrift store finds from our weekend shopping spree, I thought I'd take some more pictures to share with you.

These are the dresser scarves that I got for $1-3/each...


On the far right of the bottom picture is actually a "single" pillowcase that I found for 99¢.  There is no embroidery on it, but look at that spectacular crocheted edging!!!


Hey...it even matches our new quilt!  LOL  That last picture also gives you nice look at the pretty hand quilting in the quilt!  :)

And, last, but not least, we've been looking for a nice rug for under the coffee table for a while now, but none had put themselves in my path.  Until now...


For some reason, the picture doesn't do this baby justice.  It looks faded in areas in the picture, but believe me, the colors are rich and beautiful and it has no areas of wear.  It is 100% wool, hand-knotted, made in India.   The fringe on the ends is so soft, it feels like silk!   It is so plush that you just want to stand on it with your shoes off!  :)    (See...that's what Ginger is doing under the coffee table!   As for the covers on the sofa cushions...pet owners know why they are there...a feeble attempt to keep the dog hair out of the sofa cushions!  LOL)

Loretta


Saturday, March 2, 2013

A Quick Get-Away...

Quote for the Day:
"Normal is not something to aspire to, it's something to get away from."
~Jodie Foster

Andy & I had to go to Ikea to pick up the new storage cabinets for my new sewing room.  Unfortunately, the closest Ikea is 2 hours away...in Pittsburgh, PA...so we thought we'd make a "trip" of it and enjoy ourselves!  
We left on Friday morning and returned Saturday afternoon.  We spent our time in Pittsburgh doing what we love to do...we went "thrifting"!   There's a site, http://www.thethriftshopper.com/, where you can go and put in the name of the town or the zip code, and it will give you a list of thrift stores in the area, complete with ratings from viewers!  :)   From there, I entered the addresses of thrift stores into Google maps and put them in an order that made best use of time and gas.  :) :)

We had a BALL!!!  I think we probably visited about 8 thrift stores and got some really cool bargains.  However, the prize for the day were these finds:
  • Not ONE, but TWO, homemade, hand-quilted quilts in very good condition!
  • And THREE SETS of hand embroidered and crochet-edged pillowcases in MINT condition!
Both of the quilts are full-size.  

Here's the first quilt...made fairly recently...I'm going to guess about 2005 from the fabrics, etc.  The stitches are nice and straight, very even and fairly small, done in a contrasting, dark thread.  And the price???  A whopping $20.00!!!  :)


The second quilt is probably a little older...probably from the 1980-1990's, from the fabrics and colors...pastel calicoes!  :)  It is also hand-quilted, but the stitches aren't quite as perfect as in the first quilt.  However, it is still quite good and I love the colors!!  Very Spring-like and I can't wait for Spring to get here!   There are a couple of places where the binding is coming loose and will need to be tacked back down, but that is no problem.   The price on this one was an astounding $13.00!!!  (Note the unusual border...scallops alternating with points!)


And now for the pillowcases...that were $5.00 per set.  They are in PRISTINE condition and look like they have been starched and ironed and languishing away in someones hope chest...never used.  


I collect vintage embroidered linens (dresser scarves and pillowcases) and I ACTUALLY USE them!  I don't use the pillowcases that come with sheet sets.  Instead I use the vintage ones that I pick up at thrift stores, yard sales, and auctions.  And truth be told...$5/set is the most I've ever paid for embroidered pillowcases.  I can usually get them for $1-$2 for an individual pillowcase, and only occasionally find a "set".   However, because these were in such perfect condition, I figured I'd "splurge" and pay a dollar or two extra for the set!  :)

I also picked up about 4-5 embroidered dresser scarves, but I didn't take a picture of those.  I really hit the mother lode of vintage embroidered linens this weekend!  :)

After our thrifting, we headed to Ikea and picked up the bookcases/shelving units that I need for fabric storage in the new sewing room.  This was the first time we'd been to Ikea, and I'm glad I did our "shopping" online and had already picked out what I wanted.  Otherwise, I'd still be wandering around that store.  That place is overwhelming!  

All in all, we had a GREAT get-away, just Andy & me.  (Ginger stayed with some friends so she had her own kind of vacation!)  

Loretta


Monday, February 25, 2013

More Moving...

Quote for the Day:
"Just keep swimming,
just keep swimming,
just keep swimming swimming swimming,
what do we do we swim swim swim"
~Dory, Finding Nemo

We make some more progress on switching the sewing room into the former master bedroom this weekend.  We were able to remove the last of the bedroom furniture out of the master bedroom into the sewing room.  

The quilting "stuff" is now all sitting in the middle of both of those bedrooms.  


The carpet in the new sewing room is now completely shampooed and ready to start bringing in my storage cabinets.  I've decided that one of the cabinets will get painted before I start moving stuff back onto it.  (It really needs a paint job...badly!)  

Since we had to empty out my wardrobe to move it, I took the opportunity to declutter and organize the way I store my shoes in the bottom of it, utilizing an idea I found on Pinterest.com.  (I actually had bought the supplies to do this several months ago, but just never took the time to follow through!  Can you say "procrastination"?)    :(

This is the wardrobe...I figured it would be easier to work with the shoes before I put all the hanging clothes back in it!  


...and these are the shoes that were in the bottom of it on a shoe rack...


I put 3 tension curtain rods in the bottom of the wardrobe...


After getting rid of the shoes I don't wear and those that are worn out, I placed them against the tension rods.  If there are heels, you can hook them over the rod...otherwise, they just lean against the rod.


The shoe rack I was using before only held 9 pair and the rest were just tumbled in the open area.  You can see by the picture that I've got 9 pair in there now (there is a pair of velvet dress shoes in the box standing in the corner).  I still have room for 6 more pair since I'm not even using one of the tension rods!  :)

Loretta